Cadify Substore System
Technical Overview
This document describes the full end-to-end setup of a Cadify Substore, from Cadify Cloud configuration through nopCommerce setup to domain and SSL configuration. Follow the sections in order when onboarding a new Cadify Client.
1. Terminology
This section defines the key concepts (Client, Store, etc.) that are used throughout the rest of the guide. Make sure these are clear before you start the technical steps.
Cadify Client
A Cadify customer that owns a store and its products.
A Cadify Client can be either:
- a Company, or
- a Marketplace.
Store Role
A Store Role is a nopCommerce Role.
Technically: a Customer with Store specific Role in nopCommerce.
In Cadify:
- A Cadify Client is represented as a Customer with Store specific Role in nopCommerce so they can manage their store.
Cadify Store
A nopCommerce Store that belongs to a Cadify Client.
- Each Cadify Store:
- corresponds to a specific Cadify Client
- is connected to exactly one Cadify Cloud workspace
Cadify Service
A windows background applications which serves user requests.
- Each Cadify Service:
- corresponds to a specific Cadify Site
- is connected to one or more Cadify Cloud workspace
- continuously observes those Cadify Cloud workspaces
- supply the requests with MS Excel and Solidworks
- generates the requested files
Cadify Addin
A Solidworks extension.
- Each Cadify Addin:
- corresponds to a specific Cadify Site
- is connected to one or more Cadify Cloud workspace
- an engineer can design a product with it
- product can be published to the Cadify Store
Site vs Store
- Site example:
ovalas.no - A Site can host multiple Stores, for example:
main.ovalas.noanotherstore.ovalas.no
Cadify Cloud workspace
A dedicated storage area in Cadify Cloud used to store the Cadify Client’s product files.
- Has restricted access and cannot see any other client’s folders.
- Example path:
Apps\<ClientFolder>
Silo
A Silo is a software package
- With the Customer Role a Cadify Client can use
- a Cadify Store
- a Cadify Service (with Solidworks and Cadify Cloud in the background)
- a Cadify Addin (in Solidworks)
Cadify Authorization
The mechanism that connects a specific Cadify Store in nopCommerce to a specific Cadify Cloud workspace.
- The relationship is 1:1:
- One Store ↔ One Cadify Cloud workspace
2. Vendor Role and Entity Relationships
In nopCommerce, a Cadify Client is represented as a Customer with the Store role.
Key points:
A Cadify Client must have:
- A nopCommerce Store (Cadify Store), and
- A connected Cadify Cloud workspace via Cadify Authorization.
While nopCommerce allows:
- One Store → Many Vendors,
Cadify uses a simplified structure:
One Store represents one Cadify Client and one Vendor.
A Site can contain multiple Stores, each with its own Cadify Cloud workspace.
3. Client Onboarding Process (High-Level)
The full process of setting up a new Cadify Client has four main steps:
- Create the Client’s Cadify Cloud workspace
- Create the Cadify Client in nopCommerce
- Create and Configure the Substore in nopCommerce
- Create the User Account(s) for the Client
4. Create Client (Cadify Cloud) workspace
Cadify Cloud currently operates using Dropbox for creating client workspaces:
Dropbox/Cadify/Apps/<ClientFolder>
4.1 Create a new Dropbox App (workspace)
Log in to Dropbox Developers:
https://www.dropbox.com/developers
Open the App Console → Create a new Dropbox App.
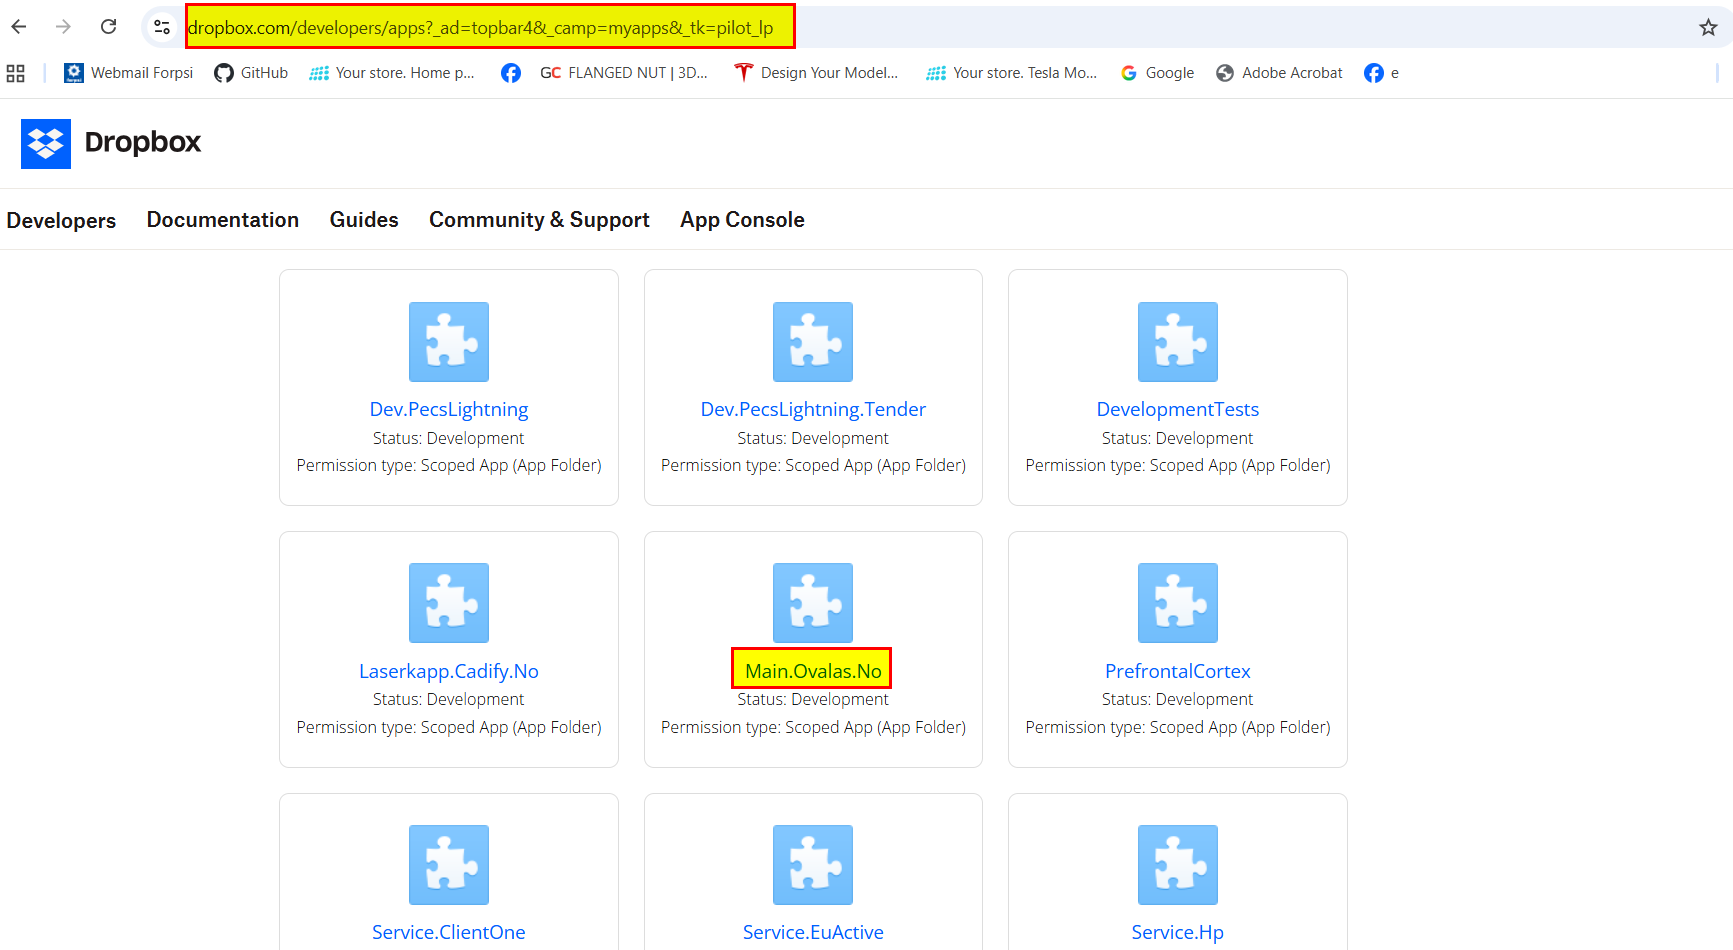
Creating an app automatically creates the App Folder.
⚠️ Be careful when creating apps. Mistakes affect file access.
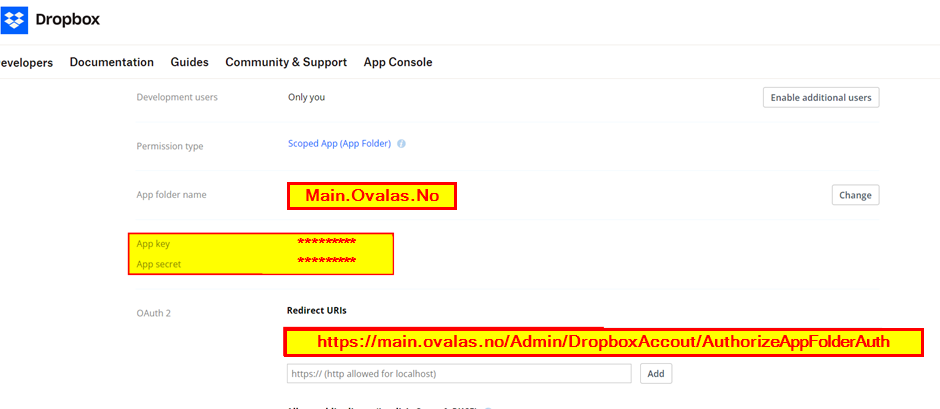
4.2 Naming Convention
Use naming:
Store.Site.Country
Example:
Main.Ovalas.No
Must match the nopCommerce Substore name.
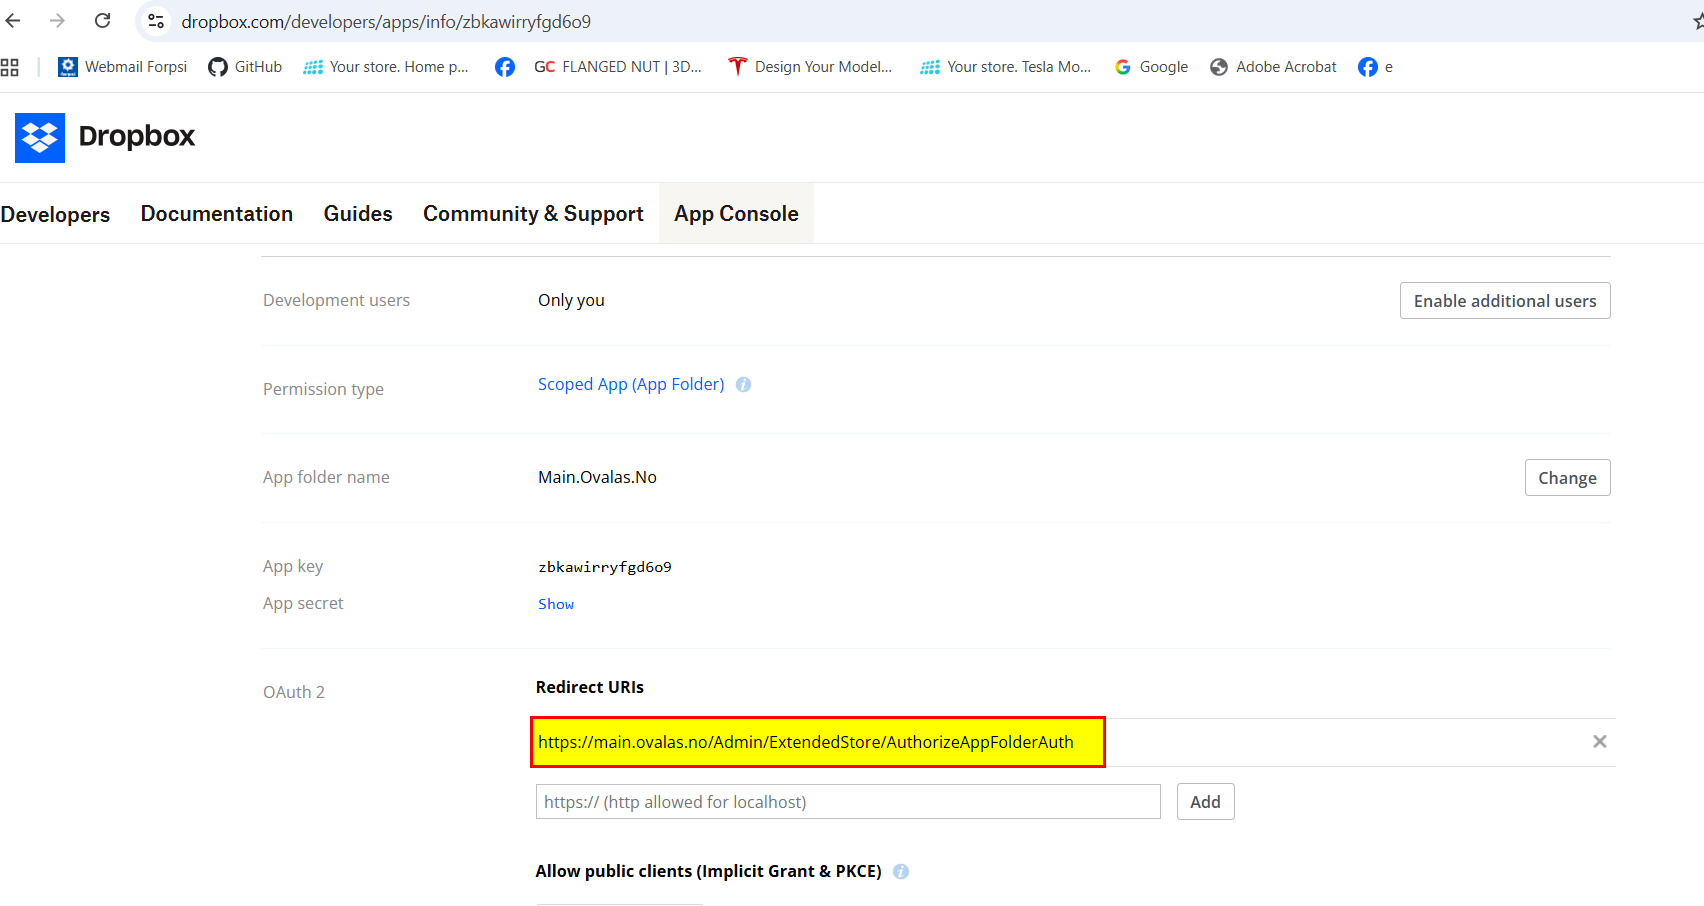
4.3 Redirect URIs
Main folder redirect URI:
Admin/ExtendedStore/AuthorizedAppFolderAuth
Each client app must include its corresponding redirect URI.
4.4 Permissions
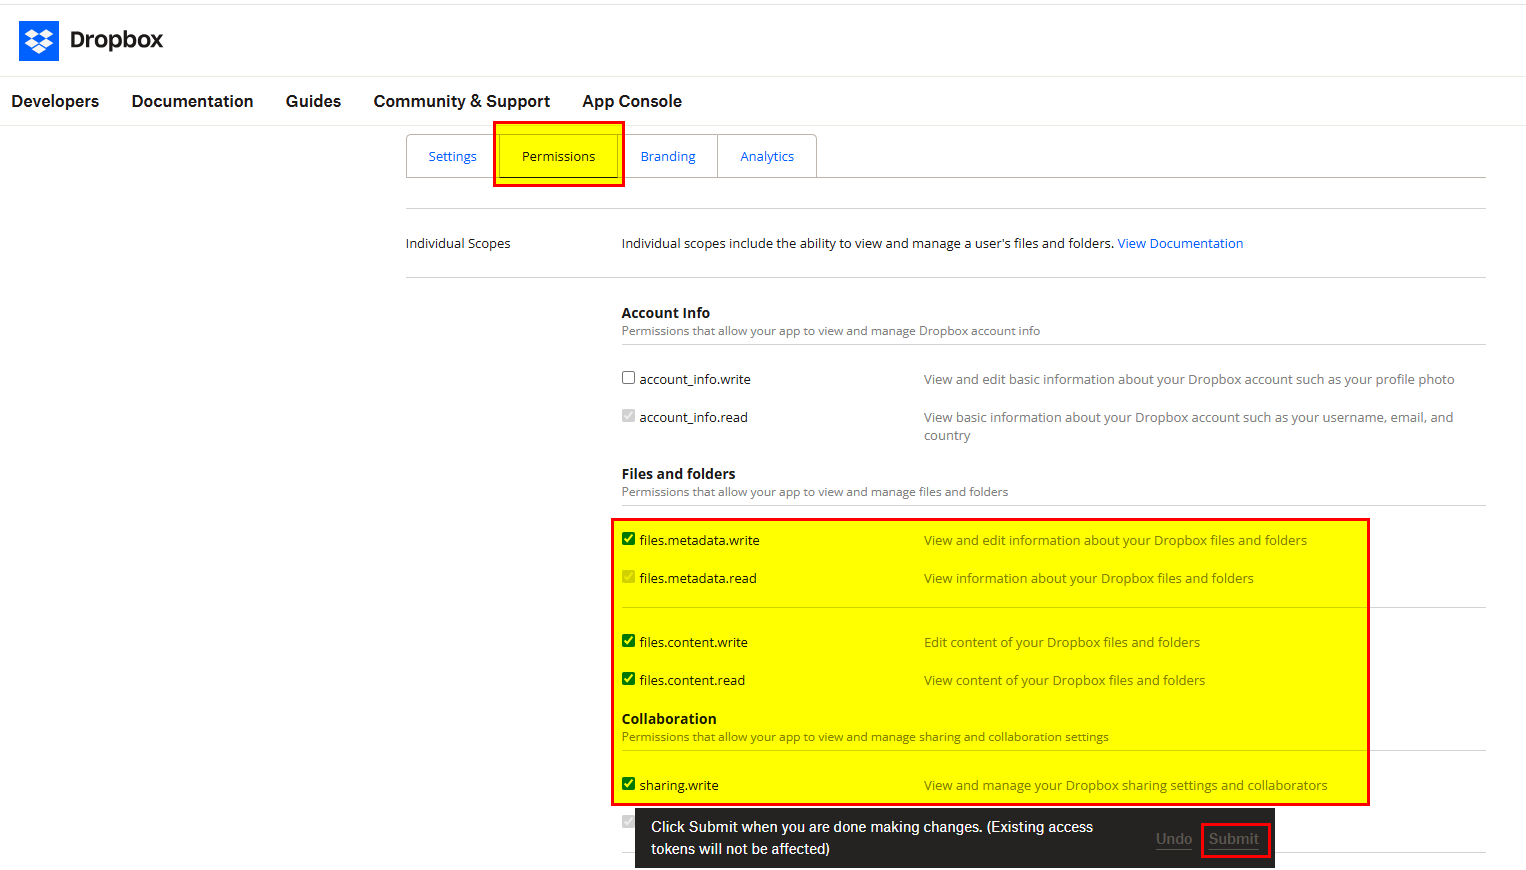
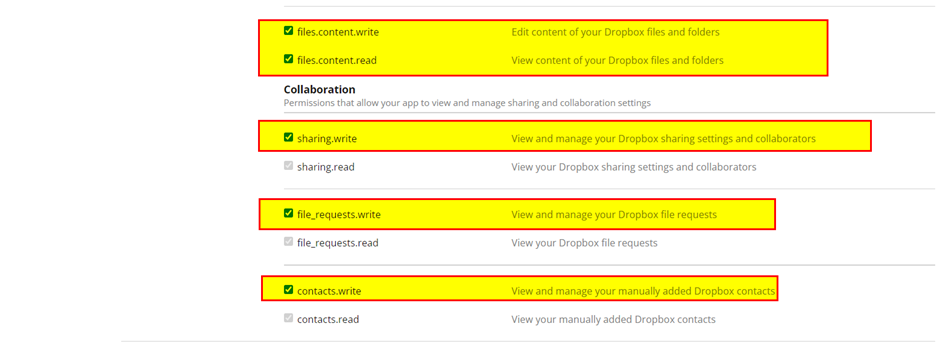
Set permissions so Cadify can upload/update/read files but cannot access unrelated folders.
4.5 Store App Key and Secret
5. Configure Substore in nopCommerce
5.1 Create the Substore
Path: Administration → Configuration → Stores → Add New
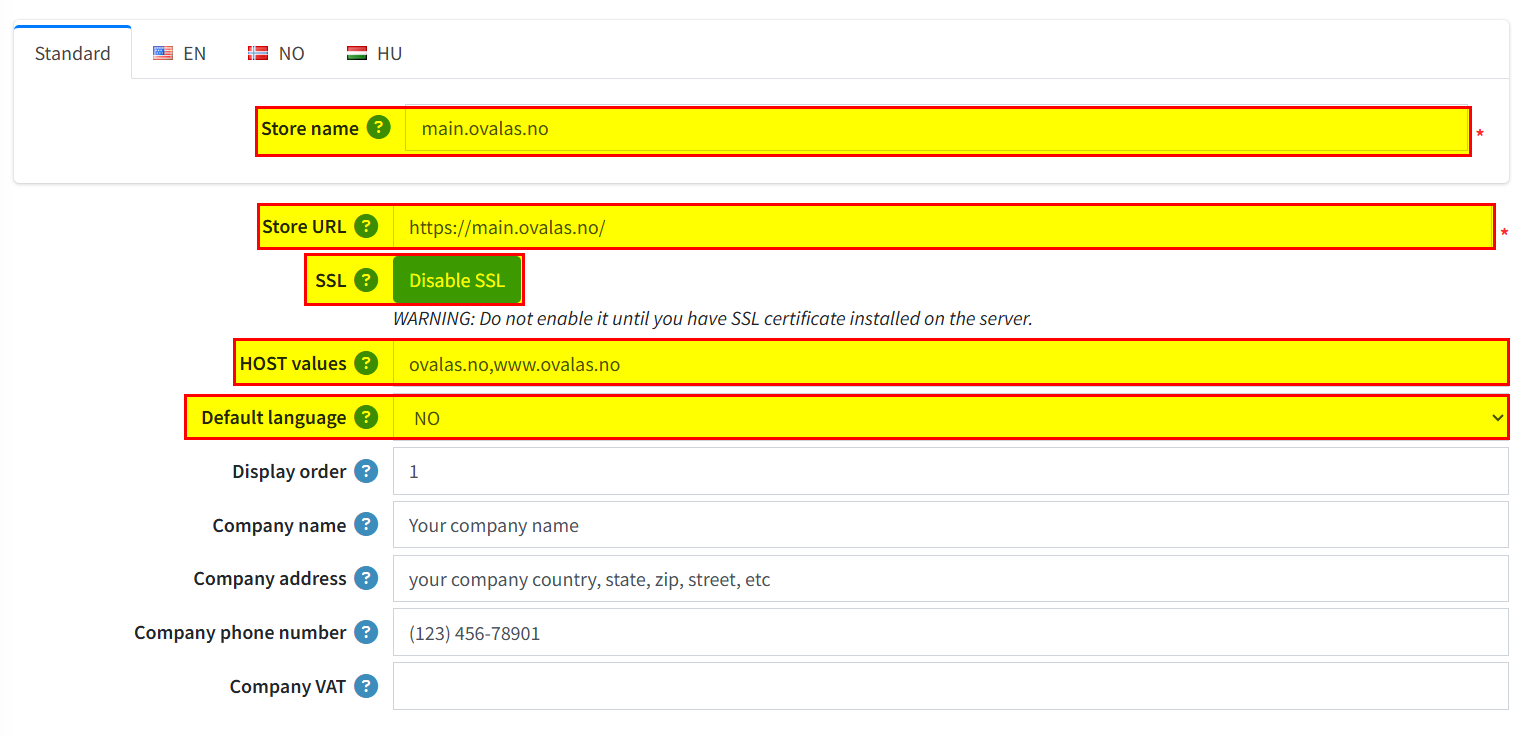
The Store name must match the Cadify Cloud workspace name.
5.2 Configure Cadify Cloud in Cadify Plugin
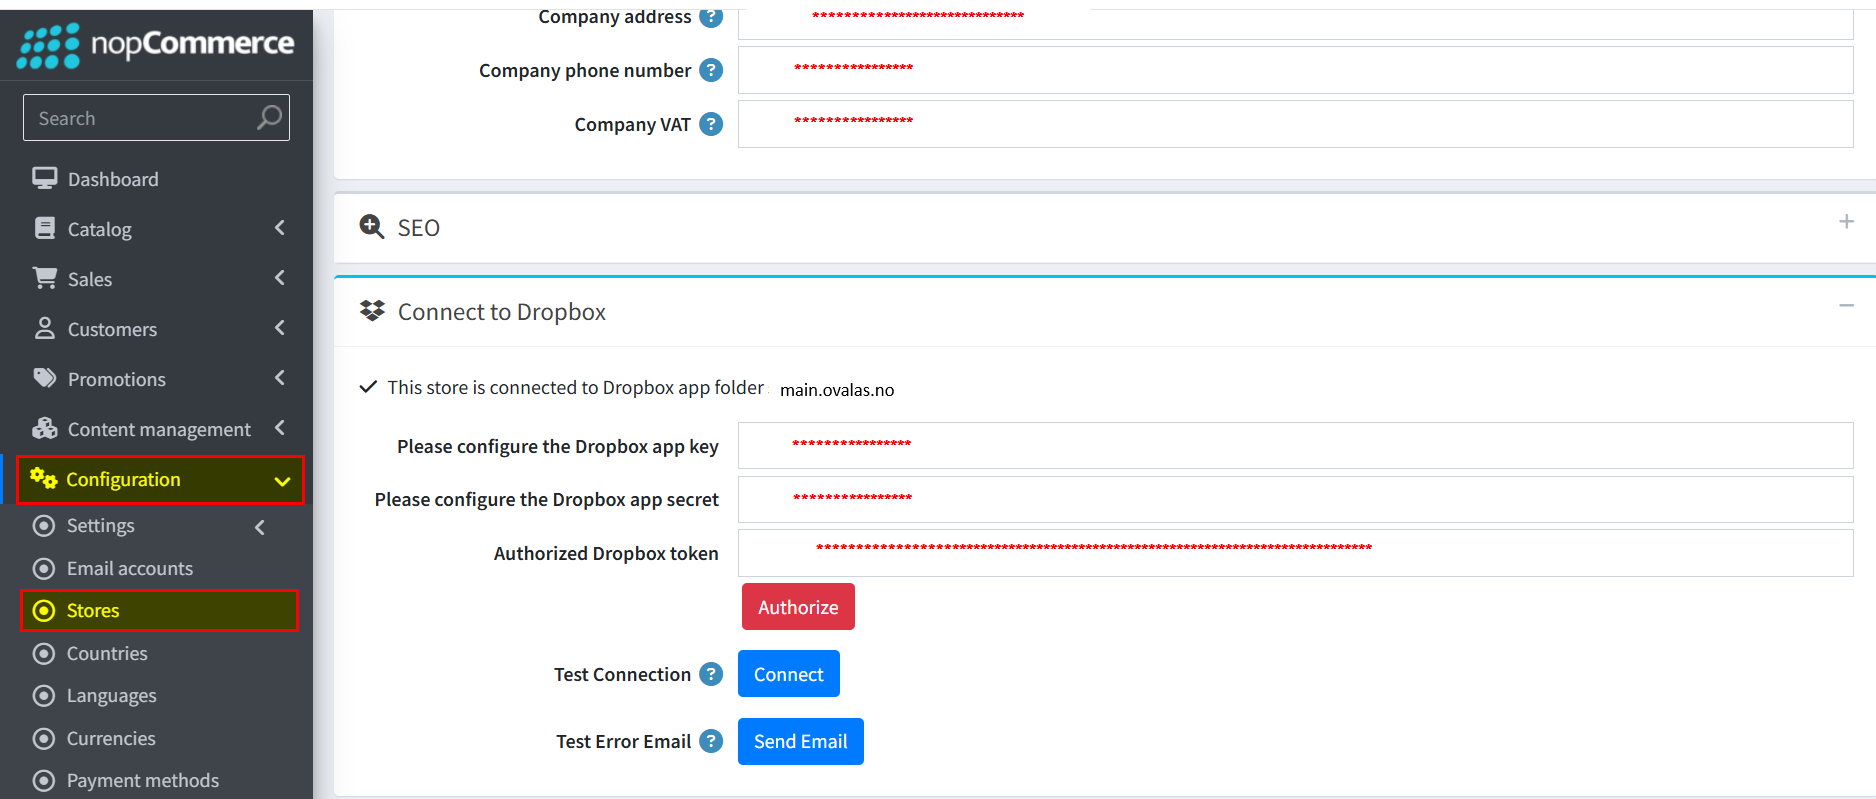
Enter App Key & Secret → Click Authorize
6. Create a Store Role
Store Role name must match:
- Substore name
- Cadify Cloud workspace name
Represents the client and controls permissions.
7. Create an Account (Customer with Vendor Role)
Steps:
1. Register customer
2. Assign Store role
3. Customer becomes client admin
They can manage products and sync Cadify Cloud data.
8. Store Roles & Permissions
8.1 Data Model
Store Role → Customers (1:N)
Store Role → Products (1:N)
8.2 Store Role as Permission Filter
Ensures isolation between clients.
8.3 Cadify Structure
Store is the central object mapping customers, products, and Cadify Cloud workspaces.
9. Create a Domain Name
In Store settings:
- Set Store URL
- Enable SSL
10. DNS Setup in ServeTheWorld
Login: https://my.servetheworld.net/login
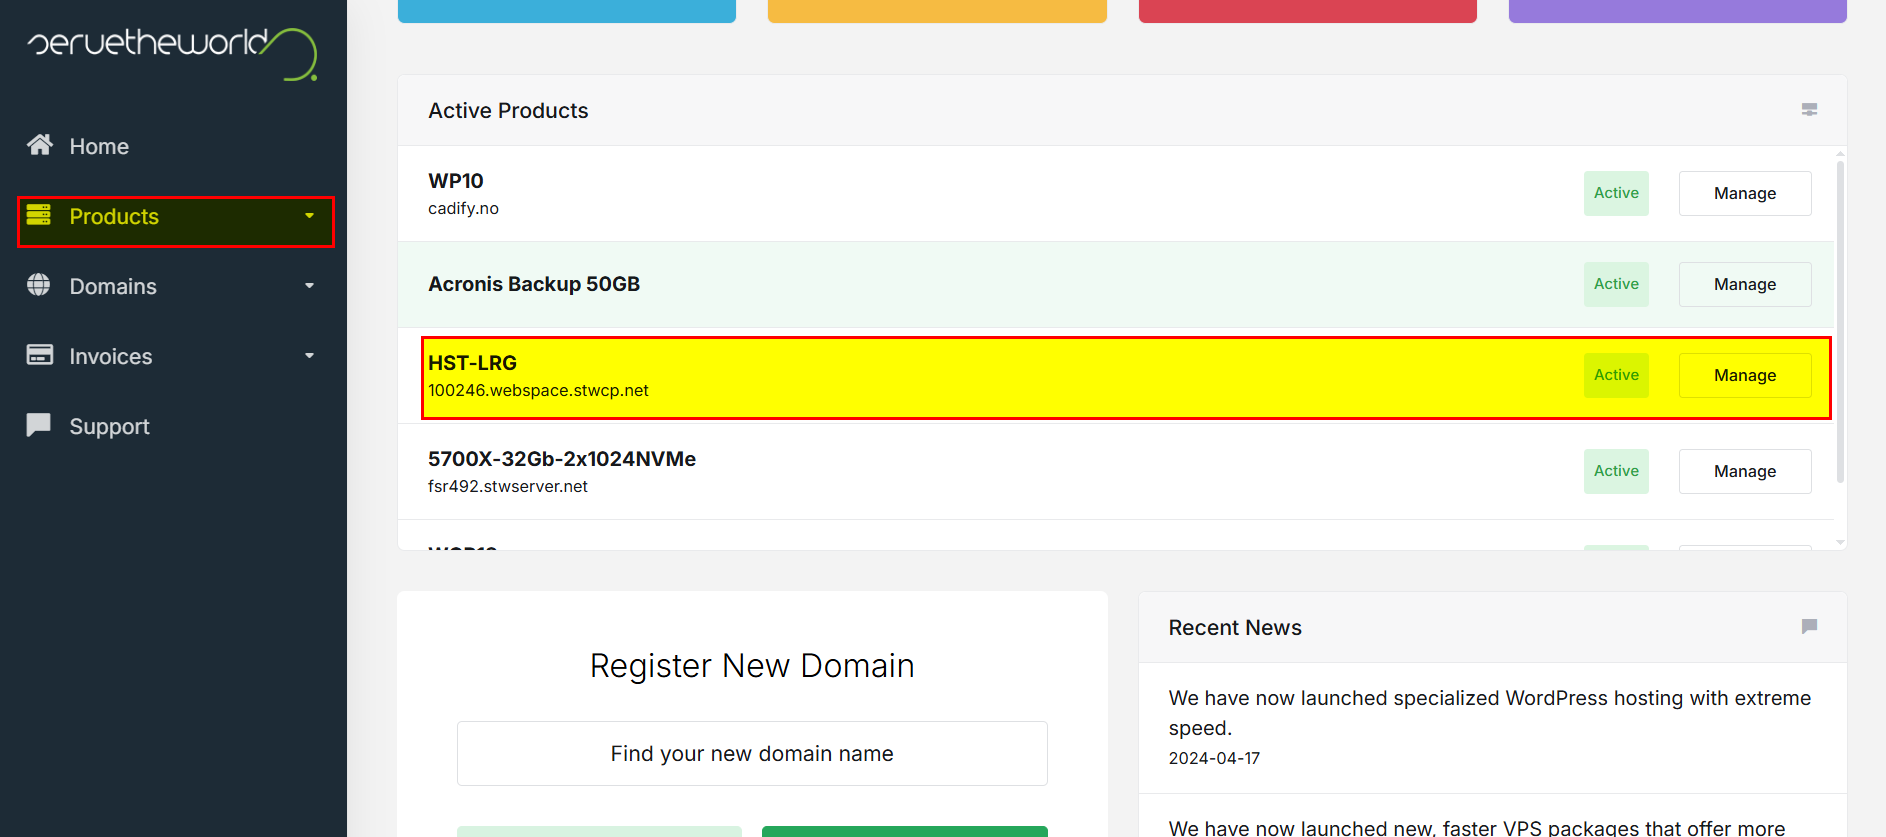
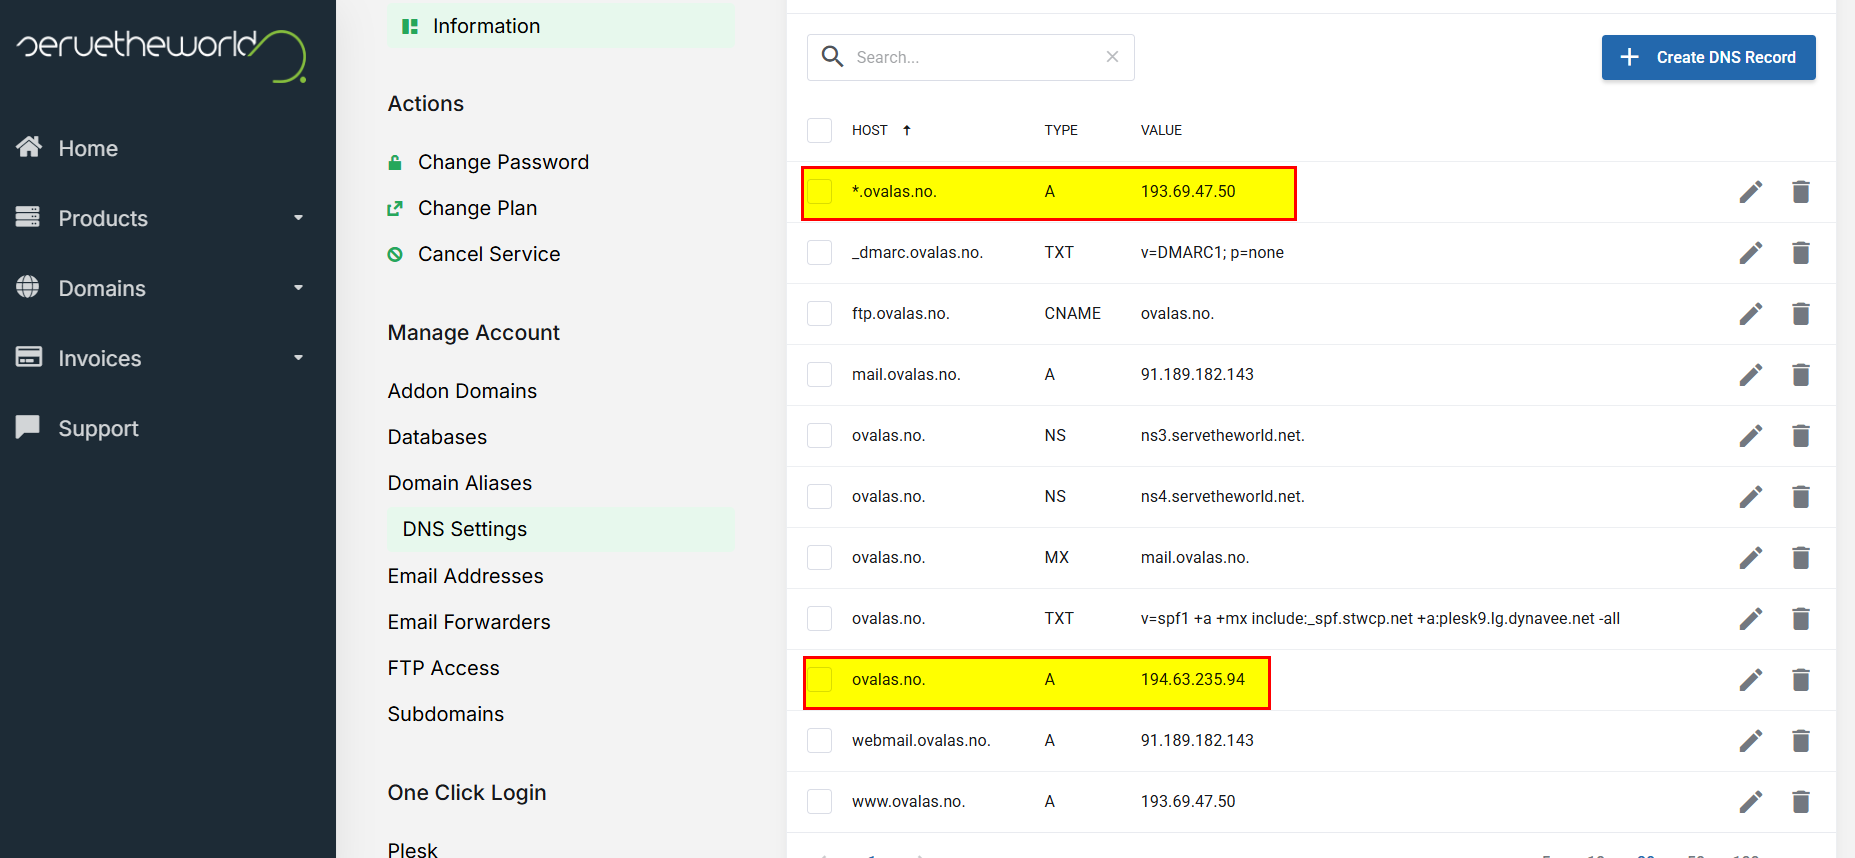
Navigate to DNS settings.
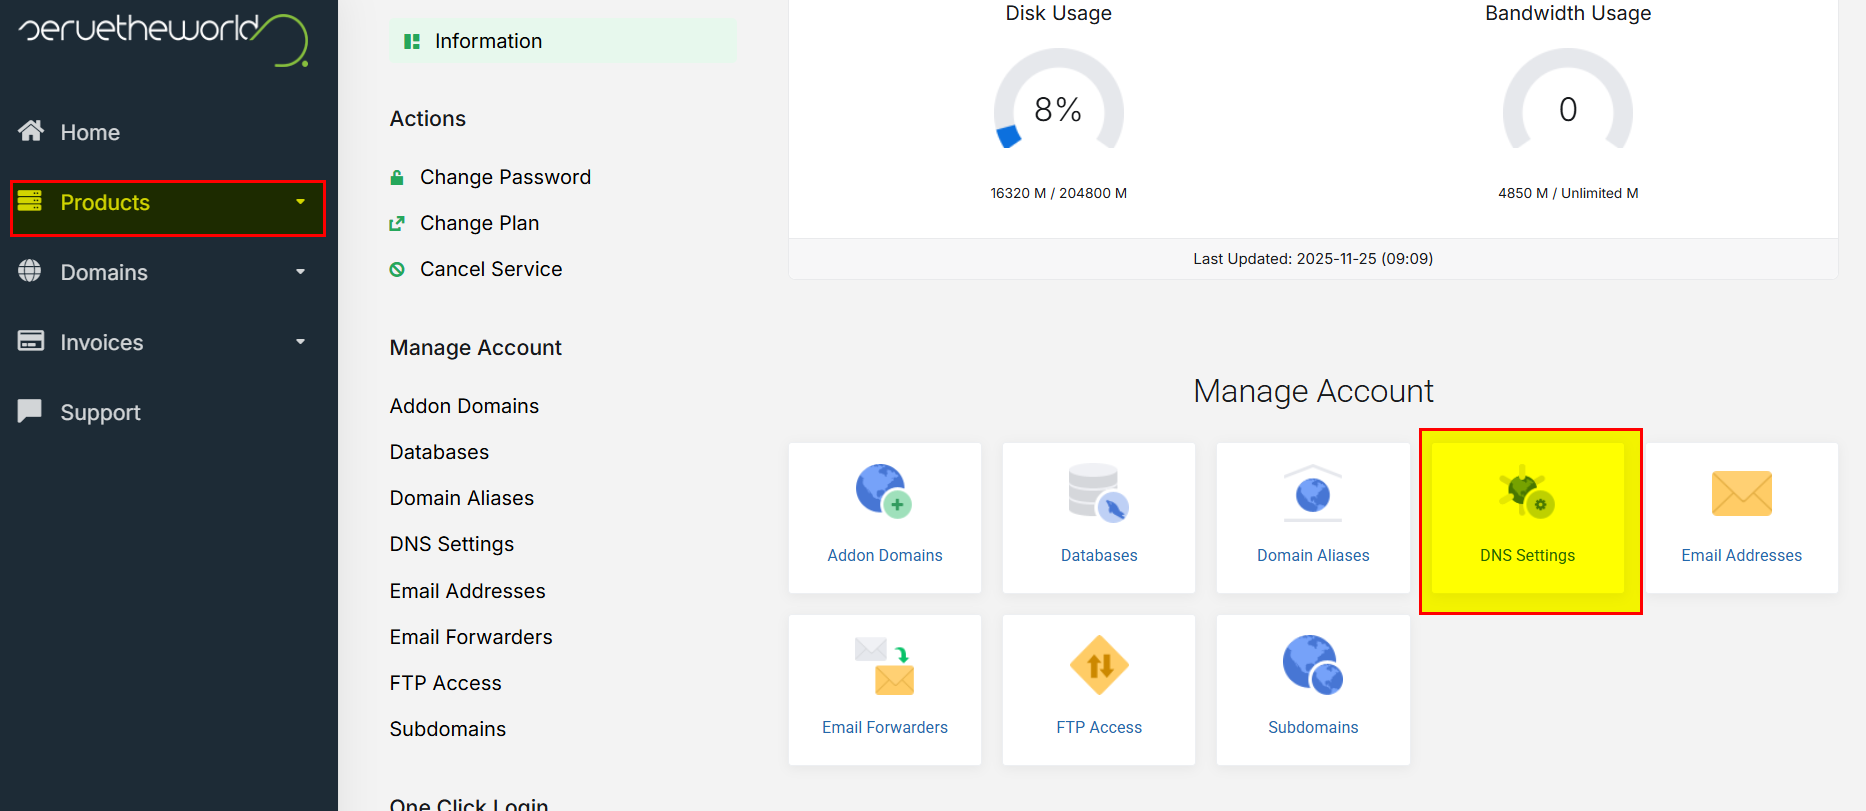
Set A or CNAME records to point domain → server IP.
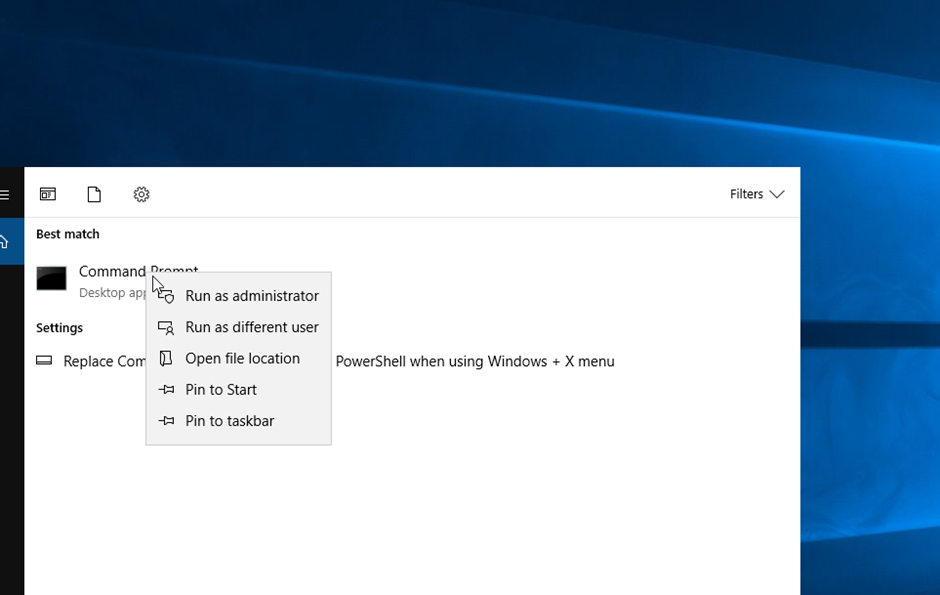
11. Let’s Encrypt SSL
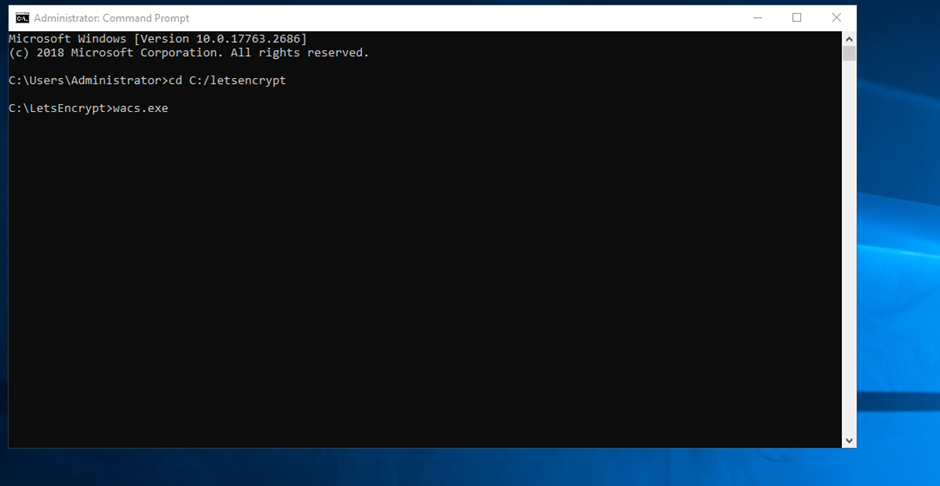
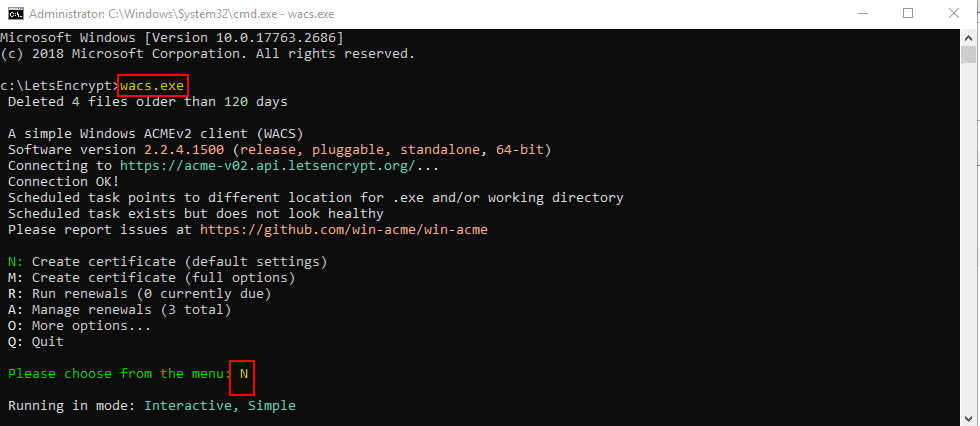
Use win-acme to generate and install certificate. Start command prompt first.
Then run letsencrypt with wacs.exe.
Create new certificate (N).
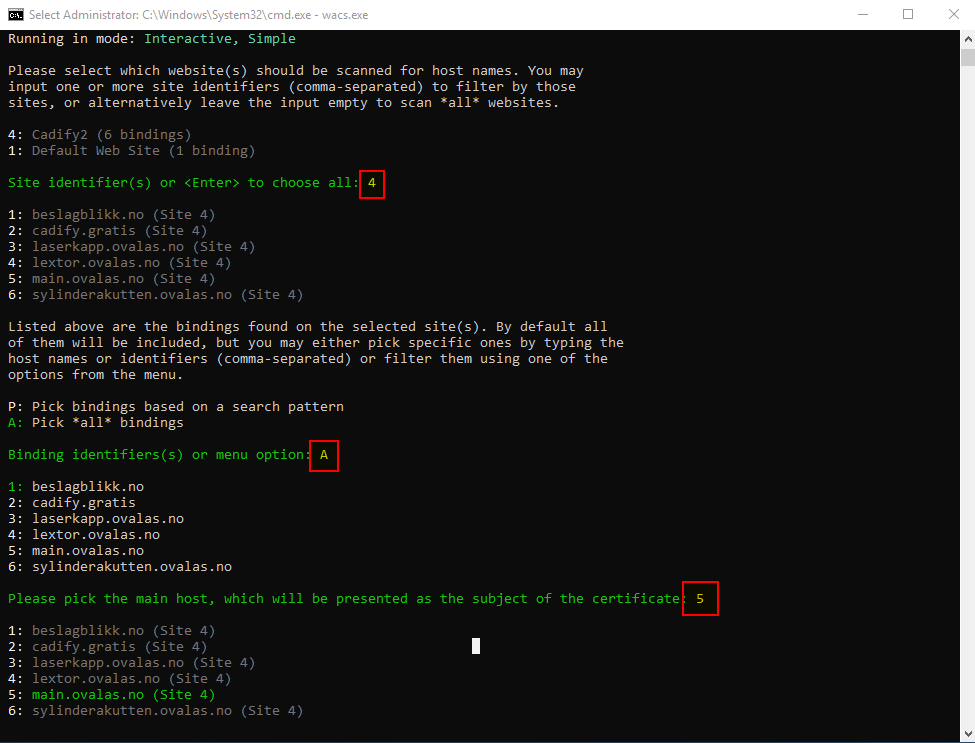
Set the site identifier (main.ovalas.no -> 4). Then Pick all binding (A). It is important to create certificate for all bindings. Then select the main host (main.ovalas.no -> 5).
Then continue that selection (y), overwrite settings (y) and replace existing task (y).
