The Cadify Sketcher
Introduction
Cadify Sketcher turns product rules into live, engineer-authored visuals that never drift from the source model. As the user adjusts parameters, the web preview updates instantly, showing exactly what the rules allow. The result is clarity during configuration and a smoother path to checkout.
Sketcher is optimized for fast, data-bound previews, not freehand drawing. Typical outputs include a dimensioned outline preview and parameter-driven hole patterns that reflect the current configuration. Interactivity comes from your Web Controls, while Sketcher renders a deterministic, rule-safe picture that matches the same parameters used for BOM, drawings, and production data.
Outputs are delivered to the storefront as clean text, grid, svg and graphs for the product page preview, and can also be exported or embedded in Reports where needed. The goal is better user guidance, higher engagement, and fewer errors, so complex products feel straightforward to configure.
How to create your own Sketcher graphics:
-
Open the Cadify Tab in Excel
Select the Cadify tab on the Excel ribbon. -
Find the Sketcher Region
Within the Cadify tab, locate the Sketcher section and click the New Sheet button. -
Select and Validate a Range
Select the desired cell range in your worksheet. -
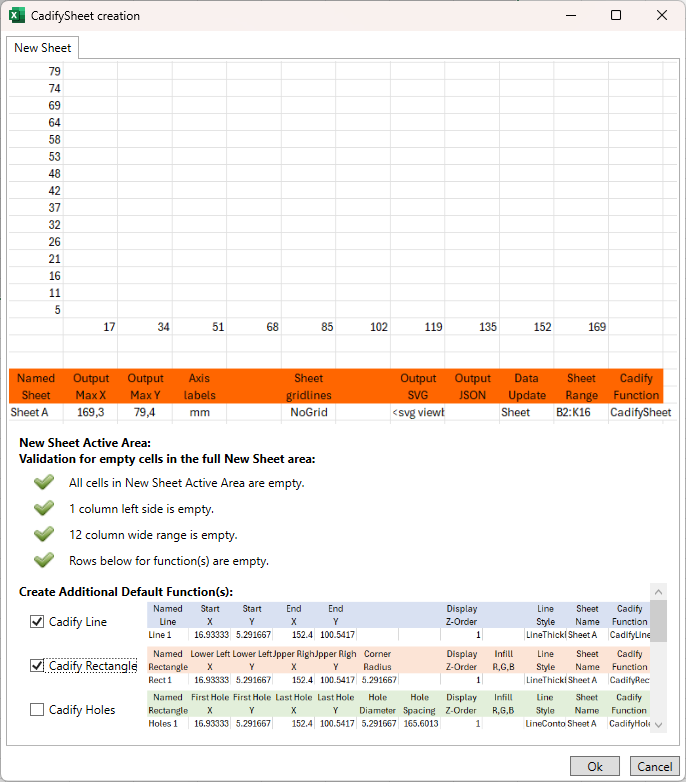
When you click New Sheet, Cadify validates your selection, checking that:
- All cells in the active area are empty,
- The left column is empty,
- A 12-column wide range is empty,
- Rows below for functions are empty.
-
The UI provides visual feedback for each validation step.
-
Configure Default Functions
After successful validation, you can select which default functions (UDFs) to create: Cadify Line, Cadify Rectangle, Cadify Holes, etc. -
Each function shows a preview of its parameters and default values for the selected range.
-
Create UDFs
Click Ok to insert the selected UDFs in the validated sheet area. -
Cadify will generate the corresponding formulas and data layouts automatically.
Example Screenshot
With the Sketcher, you can quickly build a new sheet and insert default UDFs by:
- Using the Cadify ribbon tab and New Sheet menu item.
- Validating the selected range.
- Choosing which UDFs to add through a user-friendly interface.
- Automatically generating formulas and layouts for engineering tasks.
- Check out each UDF documentation:
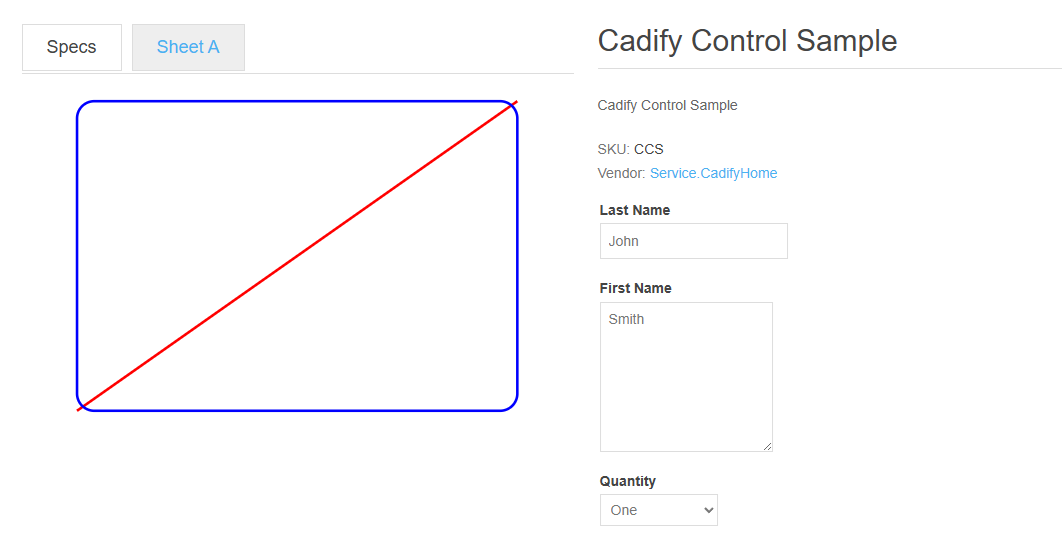
Create Output to Show on NopCommerce Product Page
-
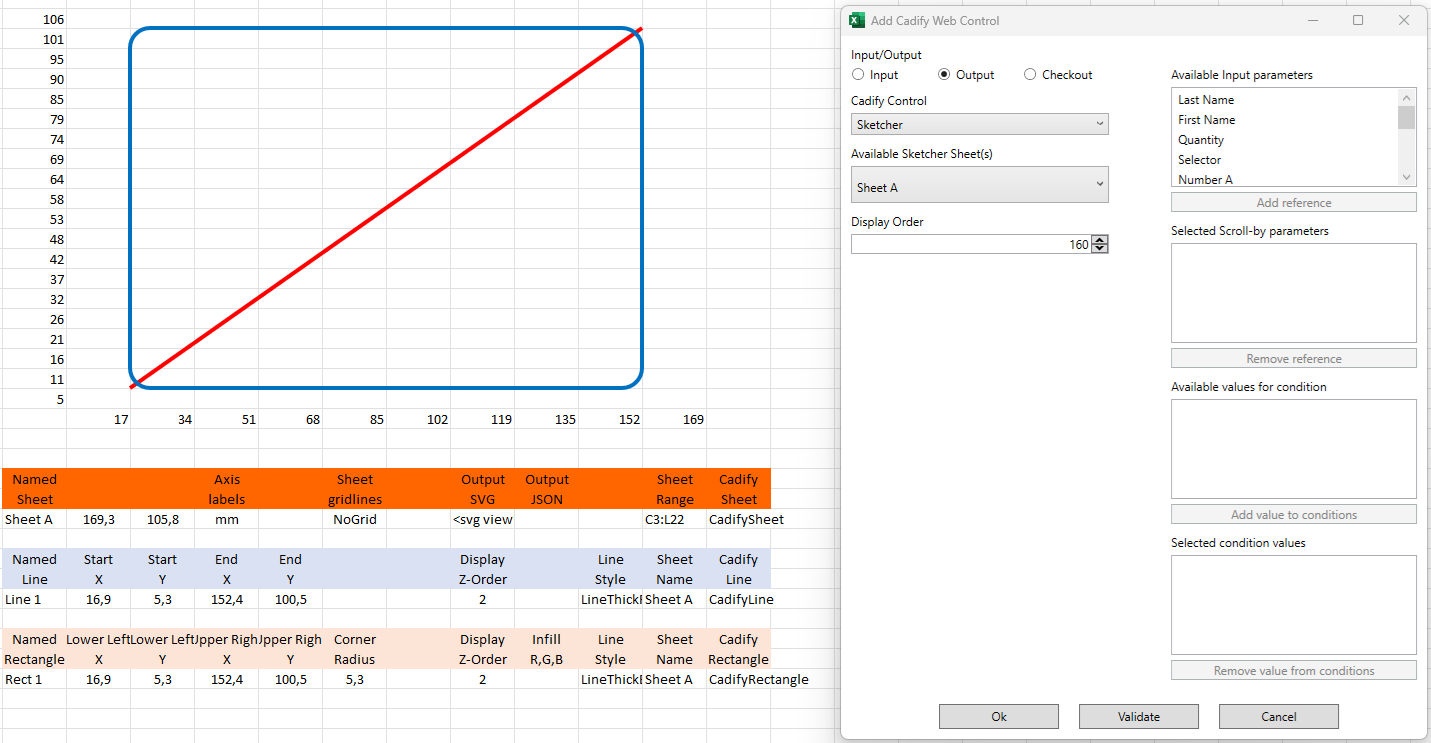
Add a New Web Control
Click the 'Add' button on the Task Pane to create a new Web Control. This will create a tab container to show the SVG output generated by your Sketcher.

-
Creation Example
-
Product Preview in NopCommerce