Create a Product with Cadify Library
This section walks you through the process of creating a product in SOLIDWORKS and adding a component from the Cadify Library. You will see how a library part is inserted, connected through Named Mate References, and checked into the Cadify MASTER so it becomes a configurable element in the final product.
SOLIDWORKS Mate References and SmartMates
In SOLIDWORKS, a Mate Reference is a feature added to a part or subassembly (SLDPRT or SLDASM) that stores up to three reference entities (Primary, Secondary, Tertiary) together with their intended mate types such as Concentric or Coincident. When you insert that component or drag it onto matching geometry, SmartMates reads those Mate References and automatically creates the specified mates. This snaps the component into the correct position and orientation. Hardware and repeatable components can drop into place without manually creating mates, as long as the target geometry provides a corresponding set of references.
Drag and Drop SmartMate Example
How Cadify Automates This
Cadify builds on the native mechanism by using the SmartMate API to programmatically place and, when needed, swap components from your Cadify Library into Named Mate References. To enable fully automated placement, you define Named Mate References on both sides: in the assembly where the component will be placed, and inside each library SLDPRT that may be inserted there. Cadify matches these names exactly and drives SOLIDWORKS to apply the SmartMates automatically so parts drop in, align, and are ready without manual picking. With consistent naming, you get predictable placement and one click part substitutions that preserve design intent.
Required: Mate Reference Name Must Match Exactly
For Cadify to connect the correct library part to the correct placement point, the Named Mate Reference must be identical on both sides.
- The assembly (parent) must contain a Mate Reference called for example "Example"
- The library SLDPRT or SLDASM (child) must also contain a Mate Reference named "Example"
- Capitalization, underscores, spaces, and spelling must match exactly
- Any mismatch results in no SmartMate connection
Correct naming is the key that allows Cadify to perform automated placement without user interaction.
Mate Reference Setup Examples
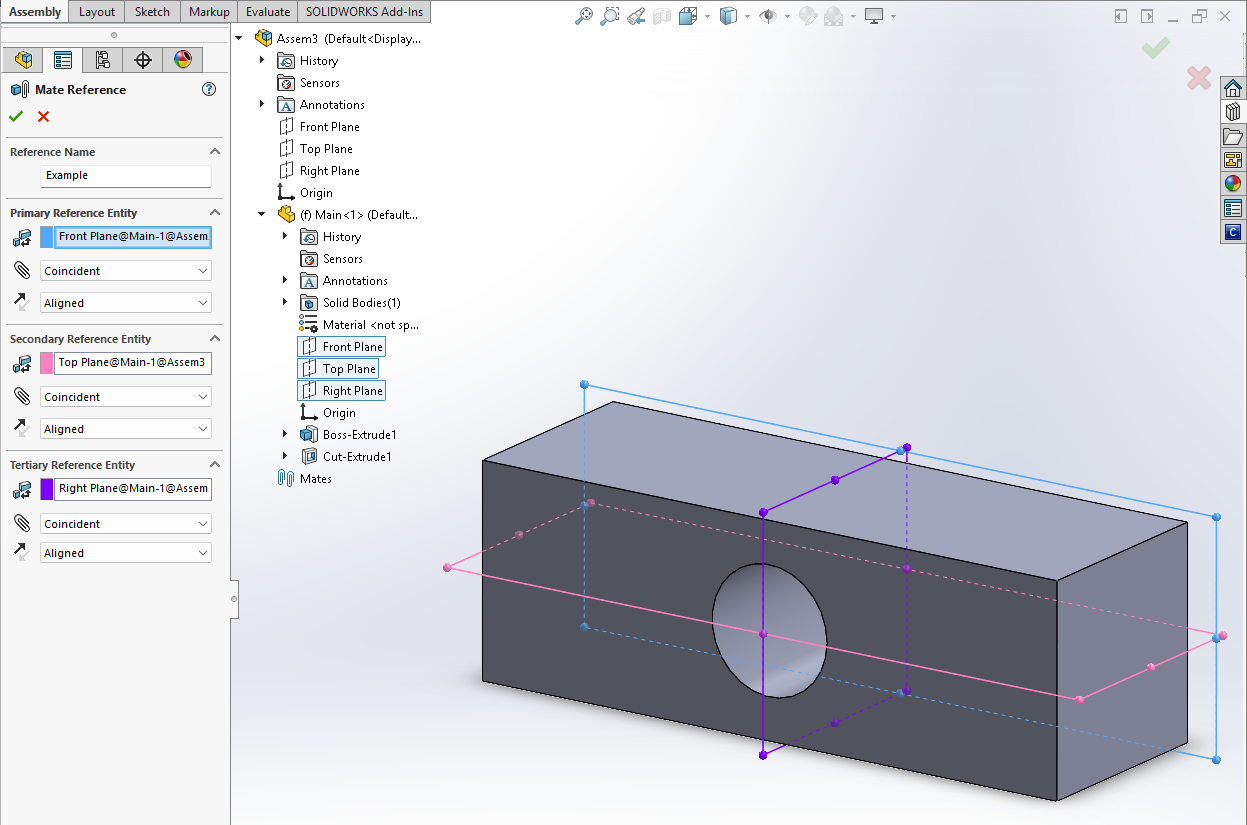
Parent Side (Assembly)
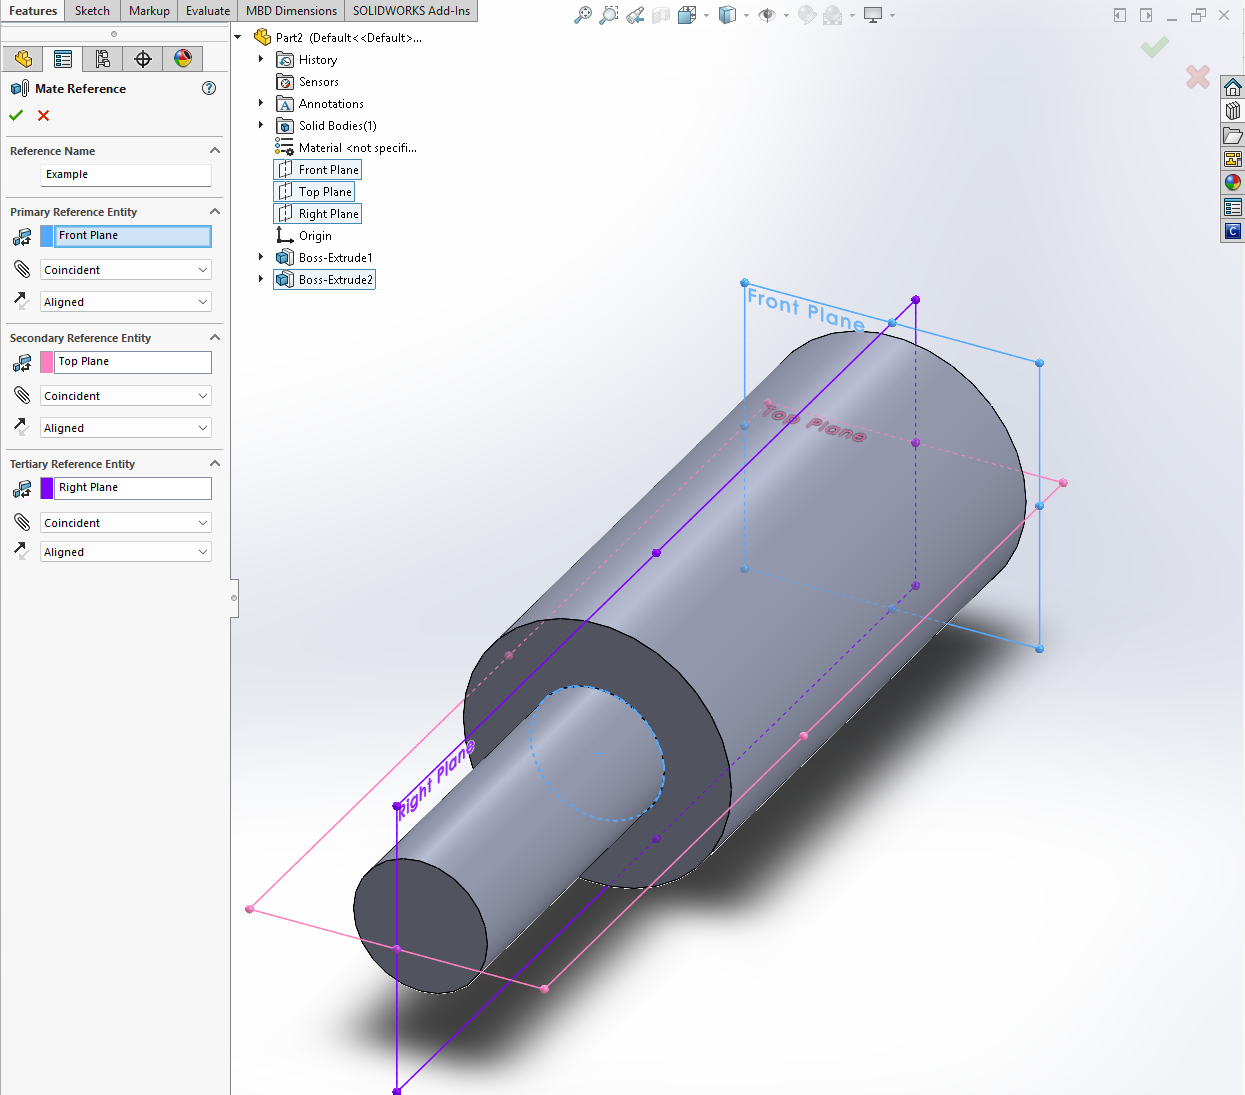
Child Side (Library Part)

Second Library Part
Orientation Ambiguity (Flipping)
It is possible for a library part to drop in rotated 180 degrees even though the Named Mate Reference appears valid and fully defined. Two related mechanisms can cause this:
1. Incomplete Mate References
SmartMates will still insert a component even if only one or two Mate Reference entities are defined. In this case, only the corresponding number of mates are created and the component retains some rotational freedom. This can lead to flipping during placement or updates because orientation is not fully constrained.
2. Plane Based References With Reversible Normals
When a Mate Reference uses a plane as one of its entities, the mate inherits the normal of that plane. Plane normals in SOLIDWORKS can reverse during rebuilds or parameter updates when the upstream geometry changes. The mate still appears valid, but its inherited direction has flipped. This causes SmartMates to reorient the component 180 degrees even though the reference name and mate types match correctly.
Both mechanisms result in the same visible outcome: the part flips during insertion or after regeneration.
Eliminating the Ambiguity
To prevent flipping, add a reference that provides a stable, non reversible direction. Keep your existing Concentric and Coincident references and include a secondary or tertiary reference that cannot flip. Typical options include:
- a short linear edge used for a Parallel mate
- a uniquely oriented planar face whose normal is stable
- a sketch axis or model edge that forces a single rotational alignment
Define this extra reference on both sides, in the assembly and in the library SLDPRT, under the same Named Mate Reference. Once SmartMates have a reference with a fixed direction, placement becomes deterministic and parameter updates will no longer cause unexpected rotations.
Replacing a Library Element
Cadify allows a placed component to be replaced automatically when its library reference changes in the Cadify MASTER (Excel). This makes it possible to swap parts, update variants, and push new configurations into the assembly without deleting or re-mating anything manually, as long as the mate reference setup is consistent.
1. Check In the Exact Element from the Tree View
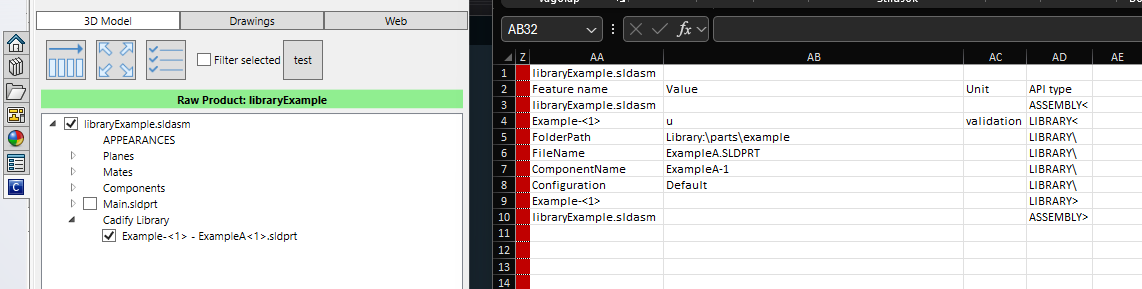
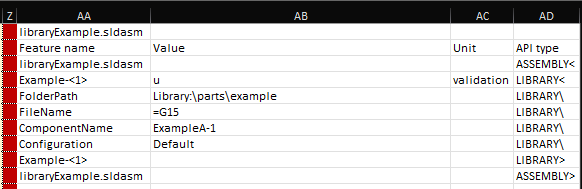
2. Locate the Row in the Cadify MASTER (Excel)
Two key fields control replacement behavior:
- FileName
- FolderPath
Example:
FolderPath:  Library:\parts\example
FileName:    ExampleA.SLDPRT
3. Create a simple control to manage selected library element
Set up the cell reference:
Cadify will resolve the new file, verify the mate references, remove the old part, and insert the new one automatically.
4. How FolderPath Works
Library:\parts\example
    becomes
C:\Cadify\Library\Store.Name\parts\example\
5. Update the model
